Sunday, April 17, 2011

A little mother daughter sewing

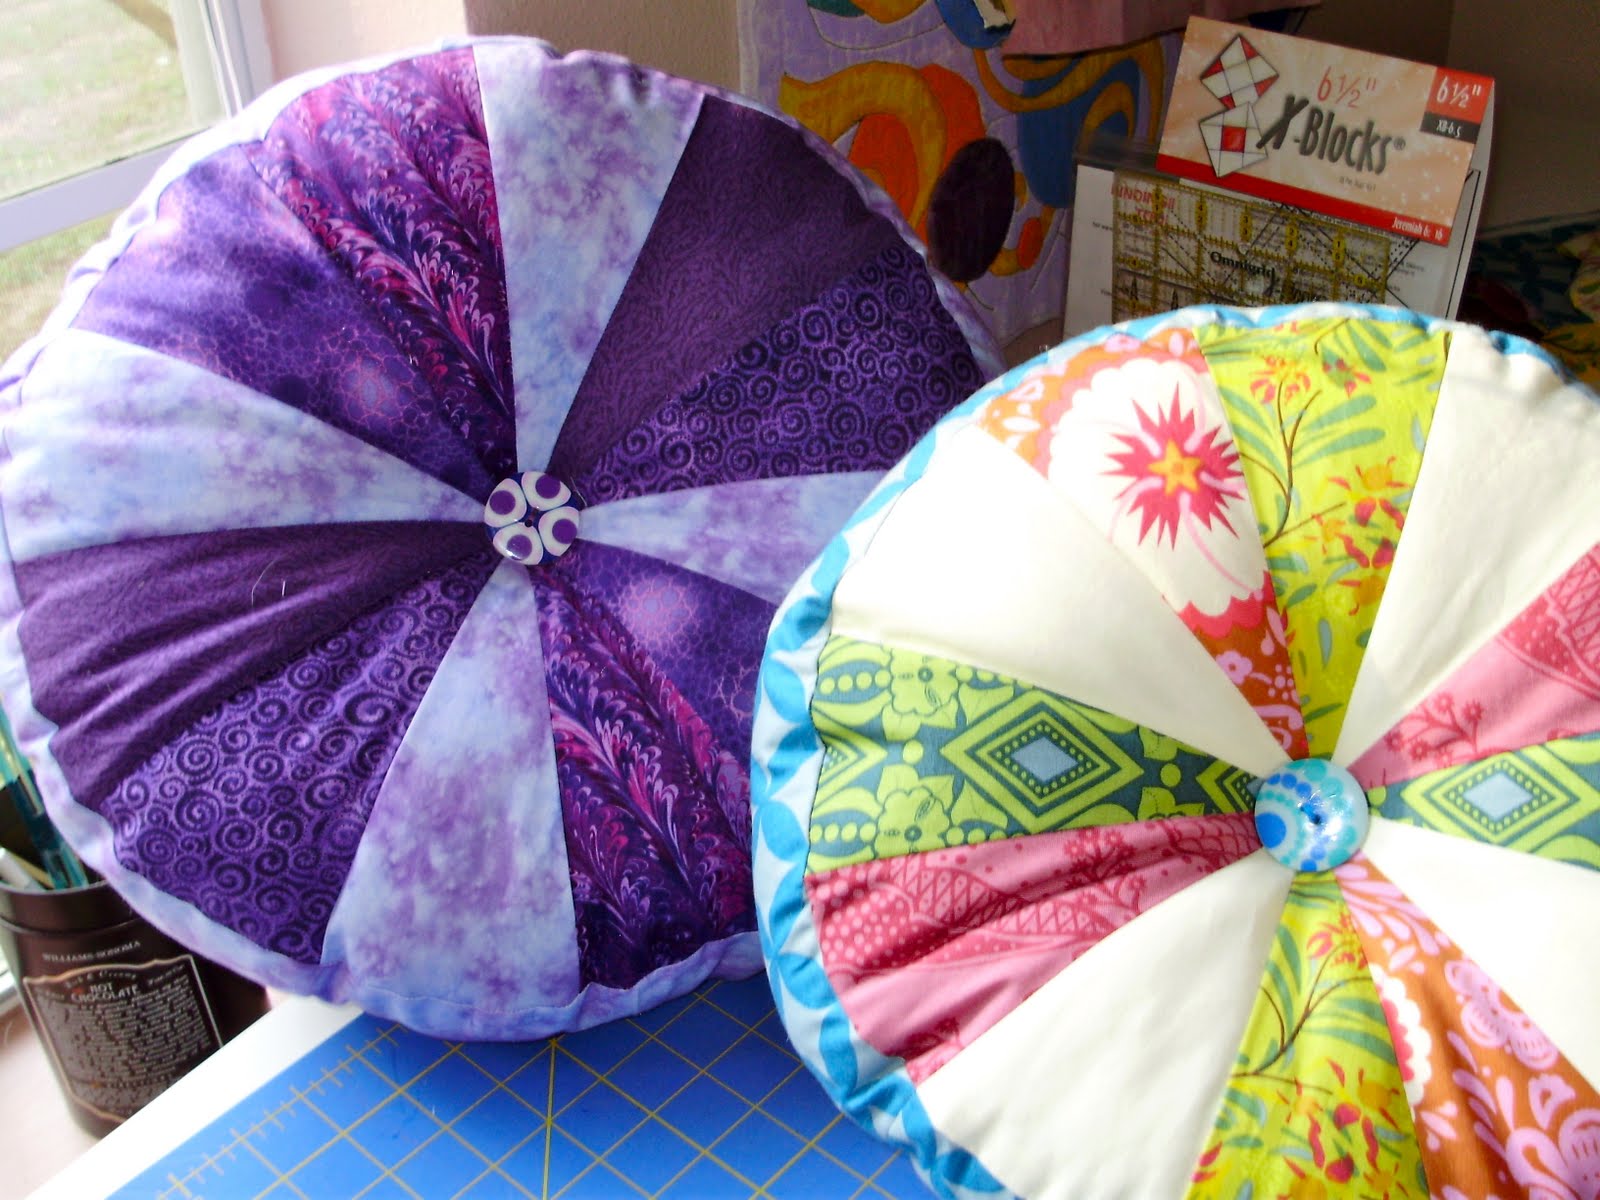
My daughter wanted to make some birthday gifts for some of her friends and I remembered seeing a cute tutorial on these "Sprocket Pillows" on another blog called "Cluck Cluck Sew" ( click to see it for yourself.)

We whipped up a couple this afternoon. The multi colored one is made from an Anna Maria Horner fabric line that I bought a fat quarter collection of and have coveted for a couple of years. I think it came out really cute.
The other one is a medley of purple scraps my daughter pulled from my stash.
I hope the girls like the pillows, if they don't I would be happy to have them in my house they are so cute and fun! I think I see some more in my future! My thanks to the Cluck Cluck Sew Blog for her excellent tutorial!

Friday, April 15, 2011

Hexie Flowers Mug Rug

Mug Rugs are a great place to use blocks that didn't make it into a quilt or to use parts of a quilt that just never came to be--like these hexagon flowers I made a couple years ago out of my hand dyed fabrics. They never got sewn together though so I picked through them and chose two for my mug rug.
I simply appliqued them onto a creamy white background and quilted around them with a pretty variegated perl cotton.
Trimmed it to an oval shape:
Then I put on a bias binding made out of one of Michael Miller's Fairy Frost fabric.
Then after closing the binding I decided I really wanted more quilting with the perle cotton and some quilting on the flowers so they didn't look so "poofy" so I continued echo quilting around the edge with the perle cotton and added some embroidery floss in colors that matched the flowers:
Not the usual way one does things but.... it was okay just tricky to hide my knots and things.
I like how it came out so I put it in the swap at the shop! We have about 10 mug rugs in the swap so far and I hope we get more! It has been really fun!


Thursday, April 14, 2011

all the extras you need!

So I am still on the longarm ownership learning curve as you well know...
Here are some items that I am finding out are really absolutely necessary for a Nolting longarm owner ( I am not sure about other longarm brands). My friend Diane pointed out that they could sell a companion tool kit with the machines - Love IT! Great idea!
Allen Wrenches -- (those weird little hexagonal wrenches for those who don't speak "craftsman").  My husband very sweetly went out and bought me a large set of Standard AND Metric Allen wrenches.  He was very pleased to be buying me tools so I received these very quickly! 
Now you might know that I still needed him to buy me ONE more that was not included in the sets (if you can believe that) and that was a 9/64ths size.  Why do you need both Standard and Metric? I don't know but you do, and for goodness sake don't forget the 9/64th's one!
 I also find myself needing several screwdrivers so this arrived today also courtesy of my ever supportive husband:
Also note he added at his discretion: a set of spring action pliers, an adjustable wrench, vice grips and a 16 foot tape measure. Many of which I would have never thought I would own!
Not pictured but something very important during set up was a nice long level.  Also not pictured is my very own tool box. 
All my long arming friends are adamant that I learn my machine inside and out so I am sure they are all nodding and smiling in approval at my progress now! Thank you all for your wisdom and support- I am gonna need it!
 And here is my ever supportive and sweet husband. Thank you honey!

working on....

I am making another mug rug to swap out of these hexies. I made these hexies a while ago out of my own hand dyed fabrics. I found a variegated perle cotton in yellow, orange and blue  to quilt it with by hand.  It is sort of fun quilting with the perle cotton because it is supposed to show and your stitches should be even but big so you get the little pop of color with each stitch. It is fun and fast. I will post more pics of it completed later.
Other news: Got some time on my long arm. Found out it's a boy-- oh yes it is a boy.... still haven't named him yet.  We are still getting to know eachother. :-)

Friday, April 1, 2011

Ellie the Elephant

My mom came back from quilt market last fall raving about lots of good things. One of the good things she found there was BJ designs. She described them as these really colorful pictorial wall hangings of horses and other animals done in fusible applique but with wild bold fabrics. She said the booth was just a feast for the eyes because of the fun fabrics used to make the animals. I was skeptical. She said she was ordering some patterns and I would see how cute they were.
The patterns came and they didn't really wow me. A few of them sold but nothing remarkable. Then BJ designs called and asked if we'd be interested in a trunk show. Yes.  They sent us 5 quilts of patterns we were selling of theirs. When the quilts arrrived I finally understood what had grabbed my mother about them at market and so did our customers.
They were fun! I also saw right away how important photos are in the selling of a pattern- EVERYTHING. Unfortunately the photos on these patterns do NOT do them justice- enough said.
My daughter took a fancy to Ellie the Elephant, seen below:
And indeed it was the best selling pattern from BJ designs and patterns we had except for this one of the horse head:
But my daughter's room is NEON green with black and white accents and she wanted it to coordinate with that color scheme... Challenging? Yeah, you could say that.
Here is what I started with for Ellie:
And here is Ellie once she was built:
 It was my daughter's idea to use the flower for her eye which I think is really cute!
So Ellie needed to be put into her new habitat:( remember I said NEON green)
So here she is at home in her place complete with borders:
Pretty fun I think.  I was a little unsure how it would look with all the black and whites but I think it is successful- not everyone's personal taste I realize but it works ya know?


Thursday, March 31, 2011

Congratulations Quilting 101!

I want to congratulate my first Quilting 101 graduating class! I had 5 enthusiastic and talented students learn quilting using the Yellow Brick Road pattern by Atkinson Designs. For most of them this was their very first quilt ever!
Here are some snippets of them with their quilts!
Samantha- all cool with blues and greens. She used a zig zag stitch to quilt the quilt with a variegated thread that matched her color scheme.
 Susan: She is custom quilting her pink and green quilt with arcs that give the quilting a cathedral window look. She mixed several lines of fabric with stunning results. 
 Melissa- has a lovely mix of batiks and prints which she did an all over stipple on.  She came to the last class on crutches! She was determined to finish her first quilt though! She also already has another quilt in the works!
 Sarah- had rich colored fabrics from Northcott's Bliss line which she did some meandering on and also some swirls on the border which just makes those blocks pop. Her colors were so electric, it is a gorgeous quilt!
 Paulette selected many fabric from the shop's Hydrangea line which she mixed with some solids for a beautiful effect. Her quilting was top notch and must have taken her a long time to mark on and then stitch!
 Wow! 
Great things ahead for all these ladies I know! It was great getting to know them and seeing how their personal styles were reflected in their projects. Everyone's product was so different but all from the one pattern. I think they all caught the quilting "bug"!

Sunday, March 27, 2011

Mug Rug Tutorial

Mug rugs are all over the internet right now.
 I just had to make one! 
I started with a 5"square which I will be using as a foundation for my selvage strips.
I weeded through my pile-o-selvages.
And found 8-10 that are sort of the same color family so they'll look like a spool of the same color thread in the end. I chose yellow here so I also chose to use yellow thread since it will show:
To make your spool: Lay a selvage strip at the bottom of your square and top stitch it down along the bottom edge. 
Lay another selvage strip on and overlap it with the top of the first strip and topstitch it down along its bottom edge as well.
Continue laying strips on, always overlapping with the last strip sewn, and stitch them down. Your edges will be goofy but you'll square them up later. Stop when you fill your square with strips as shown.
Trim your block down to (wide) 4" x 5" (tall).

Add background strips to each 5" side by sewing 1" strips on.
Next add the top and bottom of the spool with 1.25" strips of brown.
And here the little spool!
(***The block colors will now dramatically change, this is due to the fact that I did not take photos when I did the first spools because I hadn't made them before and wasn't sure if they would turn out. I went back and remade one in yellow so I could show you a full tutorial!*****)
For my mug rug I made two spool blocks and turned one sideways. I added an extra strip of background above the sideways one for the word to be embroidered on. I also attached a narrow 1" strip between the two spools just so you could see each spool a little clearer.
After I embroidered "Spools" on it my mug rug top was done and ready to be quilted!
 I wanted to have the option of hanging my mug rug so I added these super easy hanging corners. To make them start with two 3.5" squares of fabric:

Press them diagonally wrong side in.
Pin them to the upper back corners of the mug rug.
Baste in place.

Next I made and sewed on the binding just as I would with any quilt:
And when I turn the binding over to the back I hand stitch it in place just as always pulling the binding edge over the triangle edges and basting stitches, then I can just slide a chop stick in the little pockets created there.
And hang it on the wall!
In my new sewing room where else? Pictures of that will have to wait though!
I hope this inspires some mug rug making out there. I am kind of in love with this one now so I will have to make another to swap at the shop!