Thursday, December 30, 2010

Round Robin Part Two

I am not afraid of storms for I am learning how to sail my ship.


At home I opened up my first assignment and laid it all out. I read the specifications its owner had included, took a deep breath and drew a blank. 
I put it all neatly away and repeated the process again every couple of days for a few weeks. 
Nothing was clicking. 
It was not colors I liked. 
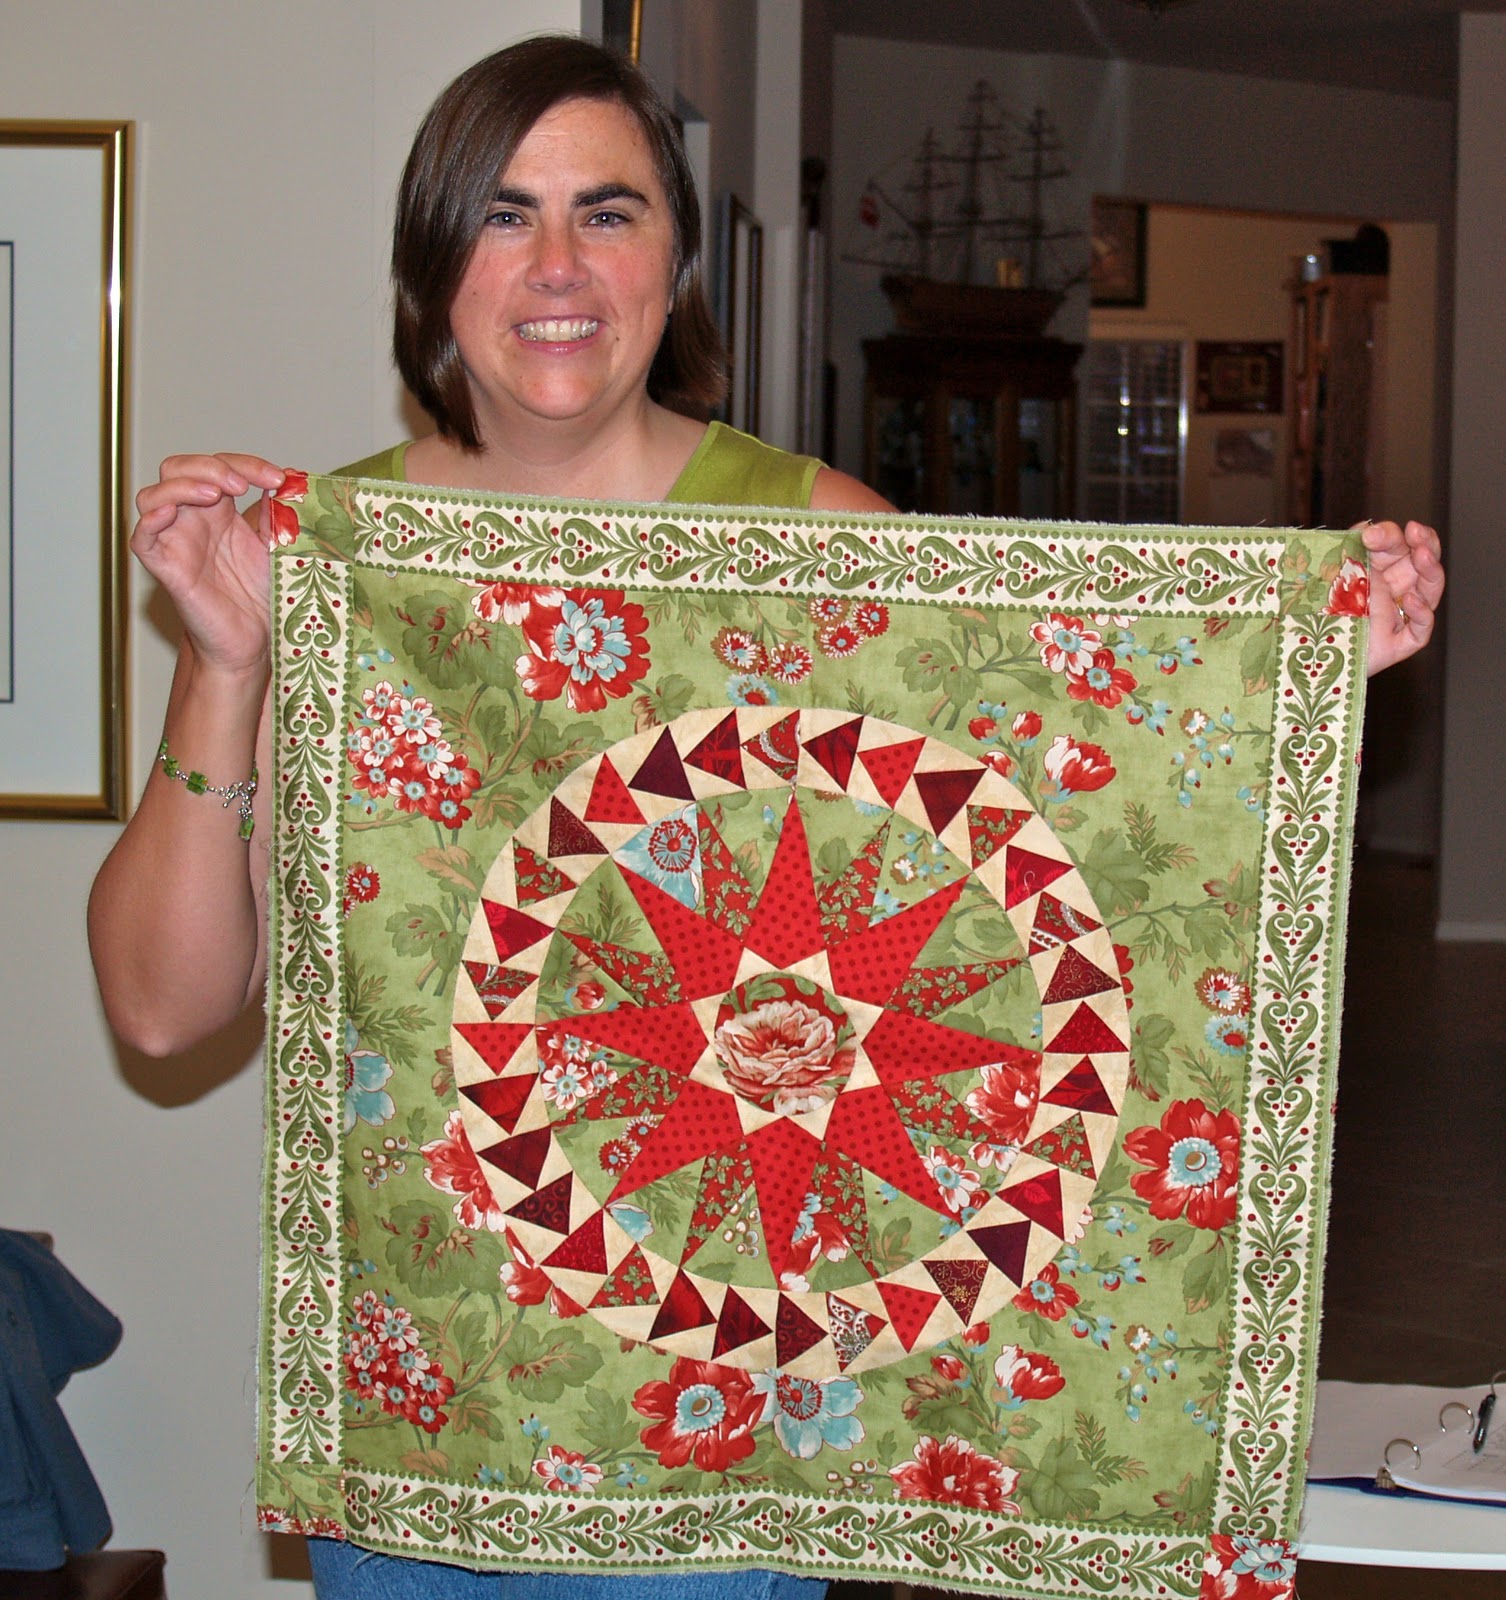
I would have never looked twice at the focal fabric for the quilt. (The green background with large floral prints) I had never considered having to work with fabrics I didn't personally feel inspired by.  
Here was a challenge!
I decided it was time to look at it in a different way. 
I stopped thinking about the fabrics and just thought about the design. What color should come next? When I put different fabrics beside it I decided the green focal fabric should be around it so it would look like it was floating in the green but I wanted a little zing with it...
I had never designed anything quilt related. I had always followed patterns. Here I had to pick and possibly design a border for this quilt top and pick the fabrics and HOPE that the owner would like it! 
The cardinal rule of Round Robins is to always work on your assignments as carefully as you want your group members to work on yours! 
What was I good enough at that would live up to the potential of this carefully constructed medallion? Paper piecing. You could do anything with paperpiecing and I had the skills so off I went looking at paper piecing patterns online, from magazines, books etc....
  The result: A huge pile of no's and a few maybe's (oh and a big big mess).
The medallion's circle of red flying geese around a mariners compass type of star really said movement.  One of the owners notes was that the ice blue color was to be an accent not a prominent color in the overall product. It needed to end up Queen size so I had plenty of room no worries there.
Nowadays, one could be really slick and plug this into a program like EQ  and do all your auditioning and experiments on it digitally but, I wasn't even aware of that existing yet. ( Hmmm....note to self: a virtual Round Robin using EQ software with a group of ladies????)
Deadline 2 weeks away, plenty of time. I had to read up on the basics of adding borders to quilts. The group had said that a danger of round robin quilts is that they won't lay flat because people apply the borders incorrectly.  You have to MEASURE and not just slap it on and cut off the extra border fabric. It was a new concept and ever eager to do things correctly I made my calculations. 
Here was another speed bump: it was  an irregular size (not perfectly square) Can you imagine! Now that would never happen to anyone else right?? Your projects are always perfect right? ha-ha
But how does that work in this situation? How do I make an increment that will work out??? 
Answers: 
1. You design to suit the measurement you have. 
2. You can add a floating border to the block to bring it to a reasonable measurement- not an option here because it already had a border print around it so it wouldn't suit the medallion to do so.
3. Do lots of complicated math to make your increments work out to fit the existing quilt.
I opted for #1. I did my main design element on the corners which included paper piecing a 3/4 block (from a book by Carol Doak on Fifty State Stars) around each corner and filling in the rest with the focal fabric to the needed measurement.  I wanted to mirror or continue that movement of the flying geese around the center. Here is what I came up with:

And Here is how this quilt finished out after everyone made their rounds on it.
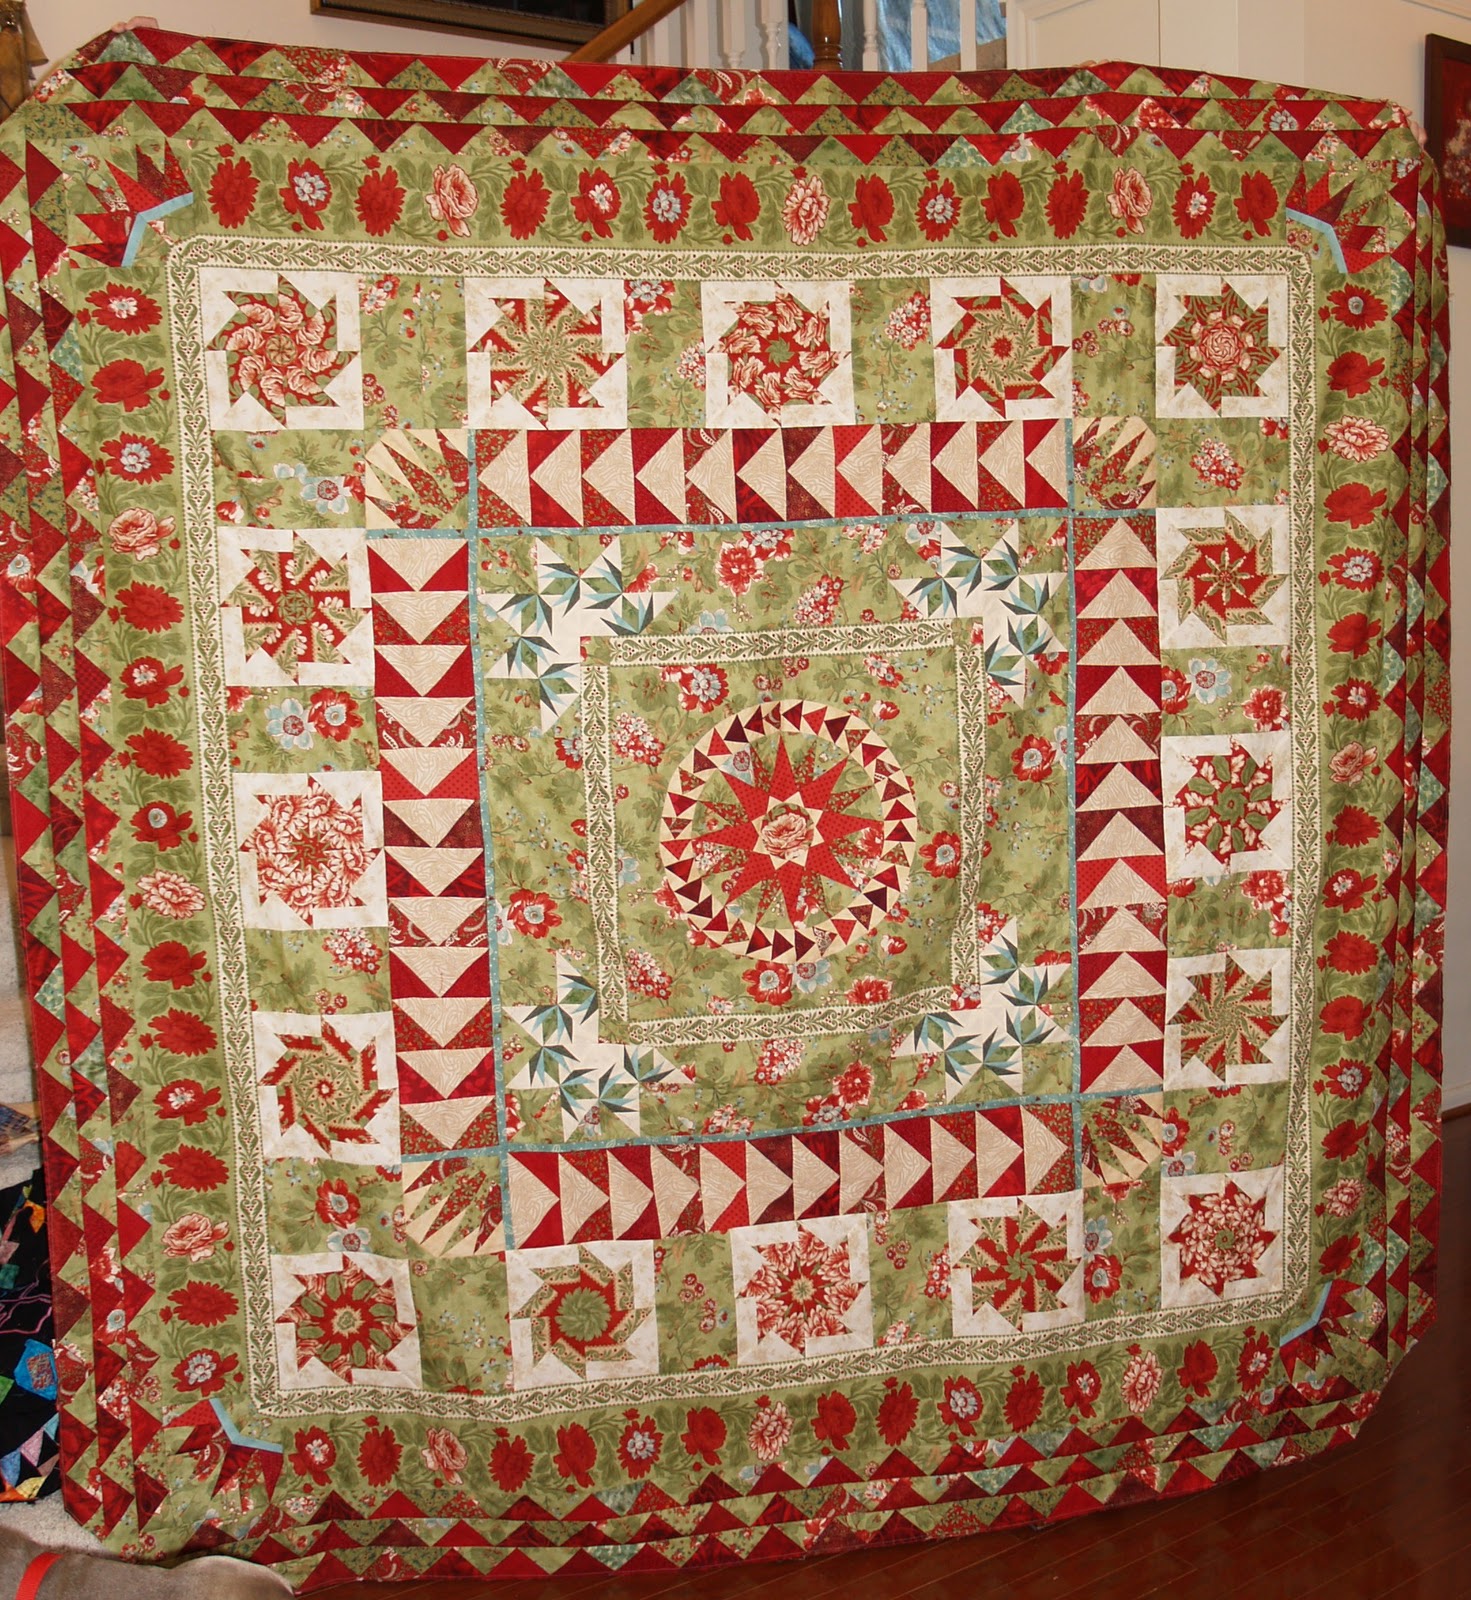
 The border after mine repeated flying geese but in reversed colors and on a much larger scale. Then came some stack and whack type of blocks, a ring of just the roses, and lastly three rounds of elongated triangles which framed the whole quilt.
It was interesting that fabric I was not inspired by at the beginning certainly played out into a beautiful quilt.
On to the next rounds...

Tuesday, December 21, 2010

Thinking about the future....


  • "When I left Queen's my future seemed to stretch out before me like a straight road. I thought I could see along it for many a milestone. Now there is a bend in it. I don't know what lies around the bend, but I'm going to believe that the best does. It has a fascination of its own, that bend, Marilla."
    - Lucy Maud Montgomery,
    Anne of Green Gables

Sunday, December 12, 2010

Round Robin Part One

One of the most educational experiences I have had as a quilter came from doing what is called a "Round Robin".  
I had never considered doing a Round Robin because I was pretty new to machine quilting but I had heard of them and even read Jennifer Chiaverini's book Round Robin from her Elm Creek Quilts series. So I was practically an expert right? 
In 2006, I was invited to join one of the bees in the Round Robin guild in Houston because they were short one group member.  I agreed but, was nervous/excited. I was committing to 5 other people that I would reliably complete my part of their quilts and on a schedule! YIKES. I was promised technical support and emotional support from my bee members who knew my experience level and had all participated before so I happily accepted. We had a nifty little packet with some basics inside (rules, contact info for all group members, due dates, basic directions for sizing borders for quilts, and basic round robin etiquette).


Our group rules were: 
1. We had 6-8 weeks to complete each round depending on holidays and our availability. These were all set up at the first meeting.
2. We would all write up an explanation or give a general picture of what we wanted OUR end product to be. Such as size limitations- must be Twin size or no bigger than 60" X 60" for a certain place on the wall, Applique welcome, no fusible applique, No whites only off whites, no florals- for a man etc, hate the color blue etc...
3. We could provide all the fabric that would be used in our quilts or we could allow others to add fabric from their own stashes as they saw fit.
4. At our meetings we would take turns leaving the room while our own quilt was discussed. For example: During my quilt's turn, I would leave the room while the other group members brainstormed, on what the next round should potentially contain. But ultimately it was each persons prerogative what they added to each quilt when it was their round- the discussion was for suggestions not orders.
 5. We would each journal about the quilt we were adding borders to, explaining why, giving the name of a pattern or designer, tell where we got the idea etc... These would be given to the quilts owner at the end.
The first big question: what will my medallion be?
I knew I wanted a colorful wallhanging to be my finished product. I decided to forbid use of white, off white and only use pastels very slightly. It would be black and jewel tones for the most part. I had a general stained glass effect in mind.  I had several exciting ideas but I ended up deciding against all my first ideas because, for all of them I had a very clear idea of what I wanted the finished quilt to look like. That is a recipe for disappointment in a Round Robin--going in with a very clear picture of what you want is a mistake- you have no input other than the few limits you set at the beginning of the exchange so it is best to go in very open minded and flexible. 
In the end this was my chosen center. 
(did I mention I am NOT photogenic?)
I had seen the pattern in Fons and Porter Magazine and decided it was exactly the right thing. It was scrappy, looked good made in my color scheme, I liked it but didn't really know where I would go with it if someone handed it to me but thought it had several possibilities, it also had four points and four is my favorite number.
So I gave my block and a pile of fabrics over to my fellow group members and embraced the first of my five members' quilts and was off!

Thursday, December 9, 2010

Quilting because thread is the best glue.

Fast Forward button here on our narrative, this is a recent quilt finished over Thanksgiving 2010. It was really fun to make.
 My spin on the Eureka pattern put out by Maple Island patterns company. It is a bit wild, I find people either love it or hate it. I called it "Painting the Roses Red" because I quilted roses in all the red squares which reminded me of that part in Alice in Wonderland by Lewis Carroll. 
I am slotted to teach this pattern as a class in February at Quilters Crossing in Tomball. It is a nice easy way to learn how to sew with curves.